New Event Wizard
The New Event Wizard is a wizard that assists you in creating new Events.
There are several ways to add a new event, you can Create Event, Copy Event, Create Free Event, use the Copy Event Wizard, or use the New Event Wizard. This help topic covers using the New Event Wizard.
Using the New Event Wizard
The New Event Wizard walks you through several pages that help you fill out a complete Event.
Step 1
Step one of the New Event Wizard includes pages for you to enter General Information and Date and Time
General Information
The General Information Section includes an Event Information Section and an Event Description Section.
The Event Information Section

New Event Wizard Event Information section
- Enter your Event information in the fields using the descriptions in the table below.
Field Required? Definition event code Required Enter up to ten characters. event category Optional An event category is another way of classifying an event, usually in a more specific or detailed manner than the event type. An example of an event category might be a site tour, panel discussion, wine and dine, or awards dinner. event title Required The name of the event. event type Required The type of program, occasion, or event activity. The Event Type is used for tracking purposes. An example of an event type might be a seminar, workshop, lecture, or silent auction. has abstract? Optional Click the checkbox if the event has an abstract associated with it. abstract deadline Optional Click the calendar  icon to select a date, or enter the date in the mm/dd/yyyy format
capacity Optional Enter a number. Max five digits. event url Optional Enter a web address for this event. registration goal Optional Enter a number. Max five digits. revenue goal Optional Enter the revenue goal for this event. Max five digits. free event? Optional Click the check box if this is a free event. projected attend Optional Enter the number of registrants you estimate for this event. Max five digits. guaranteed attendance Optional Enter the number of registrants you guarantee for this event. Max five digits. max guests allowed Optional Enter a number. Max two digits. free guest? Optional Click the check box if the event allows a free guest. Waiver Required? Optional Click this check box to make the event a waiver required. Clicking this check box will populate the Waiver Text box. Using this text box, you can add waiver-related text to it. With this waiver required setup, if a customer attempts to register for the event, they will be required to agree with the waiver text to complete the event registration. - Go to the Event Description Section
Event Description Section
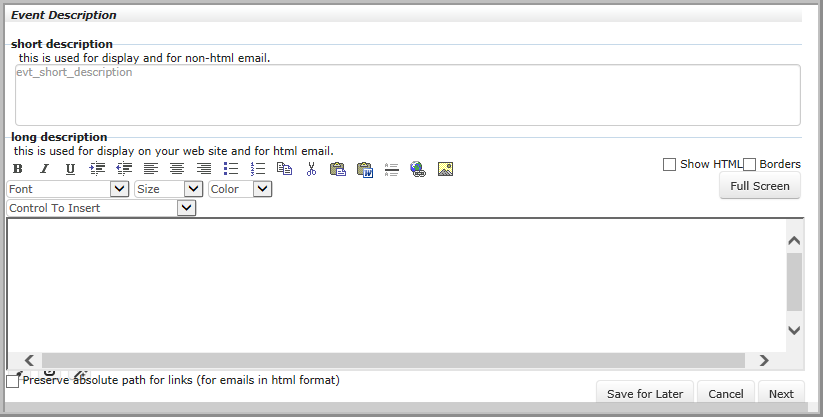 New Event Wizard Event Description section
- Enter your Event descriptions in the fields using the descriptions in the table below.
- Click the Save for Later button if you are not finished and you want to return to creating the Event later. Click Cancel to close the wizard without saving your changes. Click Next to go to the next step in the wizard.
| Field | Required? | Description |
|---|---|---|
| short description | Required | Whatever you compose in this field is used for display and for non-html email |
| long description | Required | Whatever you compose in this field is used for display on your web site and for html email. |
| Control to Insert | Optional |
This drop-down box contains database elements that you can insert into the text. These elements will update when you change them in NetForum |
| show HTML | Optional | This check box helps you compose your description. Click it if you would like to see the HTML code as you write. |
| Borders | Optional | |
| Preserve absolute path for links (for emails in html format) | Optional |
Date and Time
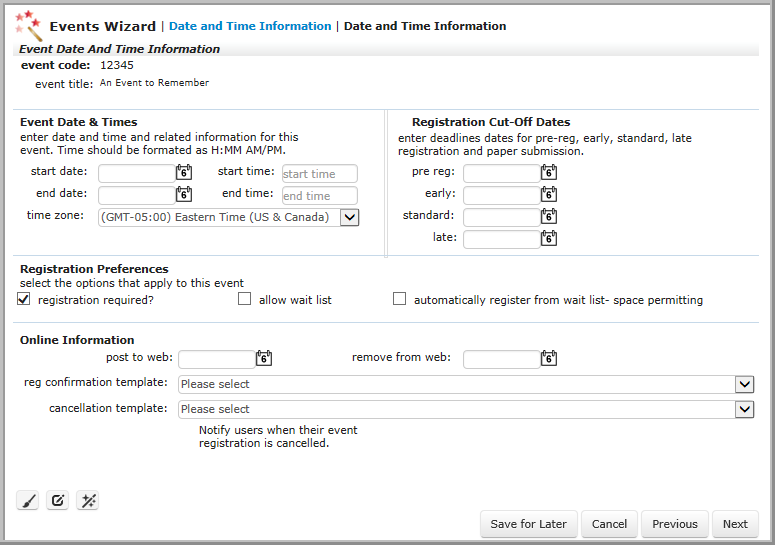 New Event Wizard Date and Time section
Event Date & Times
- Enter your Event dates and times in the fields using the descriptions in the table below.
- Move on to Registration Cut-Off Dates.
| Field | Required? | Description |
|---|---|---|
| start date | Optional | Click the calendar icon to select a date, or enter the date in the mm/dd/yyyy format |
| end date | Optional | Click the calendar icon to select a date, or enter the date in the mm/dd/yyyy format |
| start time | Optional | Enter time in the H:MM AM/PM format. |
| end time | Optional | Enter time in the H:MM AM/PM format. |
| time zone | Optional | Select the time zone for the event from the drop-down menu. |
Registration Cut-Off Dates
- Enter your Event registration cut-off dates in the fields using the descriptions in the table below.
Field Required? Description pre reg Optional Click the calendar icon to select a date, or enter the date in the mm/dd/yyyy format.early Optional Click the calendar icon to select a date, or enter the date in the mm/dd/yyyy format.standard Optional Click the calendar icon to select a date, or enter the date in the mm/dd/yyyy format.late Optional Click the calendar icon to select a date, or enter the date in the mm/dd/yyyy format. - Move on to Registration Preferences.
Registration Preferences
- Enter your Event registration preferences in the fields using the descriptions in the table below.
Field Required? Description registration required? Optional Click this check box to require Main event registration to participate. allow wait list Optional Click this check box to automatically create a waiting list once an event reaches capacity. automatically register from wait list - space permitting Optional Click this check box to automatically remove the first person on the wait list and add them to the list of event registrants once space becomes available. - Move on to Online Information.
Online Information
- Enter your Event online information in the fields using the descriptions in the table below.
Field Required? Description post to web Optional Enter the date that NetForum should post the event to your website. remove from web Optional Enter the date that NetForum should remove the posted event from your website. reg confirmation template Optional Choose the template NetForum uses to notify registrants of their confirmation. cancellation template Optional Choose the template NetForum uses to notify registrants that their registration is canceled. - Click the Save for Later button if you are not finished and you want to return to creating the Event later. Click Cancel to close the wizard without saving your changes. Click Next to go to the next step in the wizard.
Step 2
Step two of the New Event Wizard includes pages for you to enter Location and Location Room.
Location Information
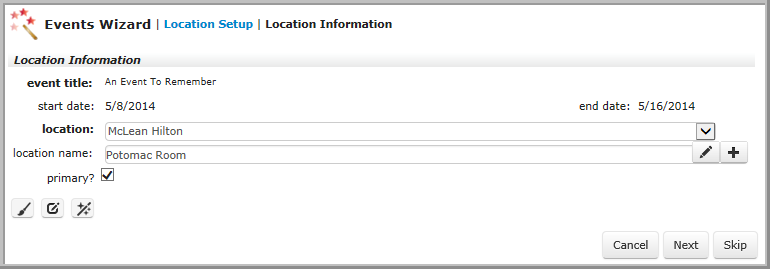
New Event Wizard Location Information section
- Enter your Event location information in the fields using the descriptions in the table below.
Field Required? Description location Required Select the venue where the event will occur. location name Optional Enter the name of the location. primary? Optional Select this check box if the location you entered is the primary location. - Click Cancel to close the wizard without saving your changes. Click Next to go to the next step in the wizard. Click Skip to go to the next step in the wizard without setting a location.
Fees
The wizard automatically creates one registration fee, and links it to the default business unit. If your event is not under that business unit, then delete the fee that was added automatically, and then create any fees that you need and link them to the desired business unit.